Christmas brings out the need to craft in me. So when Mr. Fabulous asked me to try my hand at a Home Depot Christmas Challenge, I immediately put my game face on.
The challenge was to create the Ultimate Christmas Tablescape. A table of dreams your friends and family would talk about for years to come.
The rules were: you had to craft two unique DIY projects using elements from The Home Depot’s gorgeous Christmas Collection paired with items from The Home Depot you wouldn’t normally associated with Christmas.
I WAS BORN FOR THIS! The craft duel to end all craft duels.
Time to hit up my neighbourhood Home Depot.
To set up my overall colour scheme, I first selected some wonderfully festive pieces from The Home Depot’s ‘Timeless Traditional’ Christmas collection. An adorable Nutcracker, a thatched green and red table runner and a tube of green, red, and gold ornaments. Now that I had that nailed down, it was time to get creative!
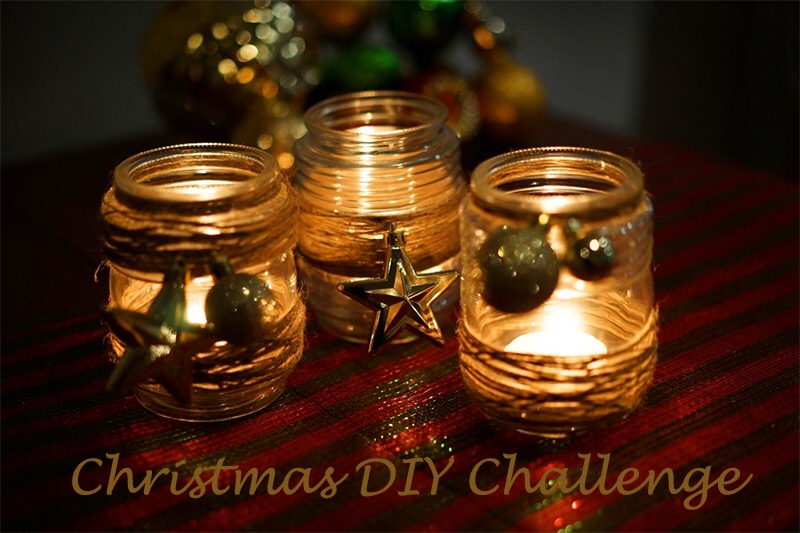
I think Christmas tablescapes look their loveliest when illuminated by candles. Plus, who doesn’t look extra gorgeous by the soft glow of a burning flame? Votives it is!

To create these little beauties, I first searched for glass vessels: something to hold the candle in. The lighting aisle was where I found these perfect (and super affordable) clear glass jam-jar style light fixtures.

Creating some texture and visual interest was next. I meandered around until I found the line, twine and rope aisle. Using the thin, Everbilt ‘medium sisal twine’, I wrapped the fixtures, securing the end of the twine with hot glue.

To add some more pizazz, I simply affixed some small, golden ornaments, then placed a candle in the bottom.
For my second DIY, I was inspired by the perfect place setting. Having a charger under even the simplest of plates brings your entire table to life. Chargers it is!

Finding myself in the wood aisle, I chose a 16” wide plank to have cut into six, 14 x 14 squares. I made them large enough so my 11” plates had some room to breathe. The associates at the Home Depot are incredibly helpful and did the cutting for me… Though how fun would it have been to use this saw?!

I then found a neutral wood stain colour to complement my colour scheme, some sand paper and sponge-tipped paint brushes for application, glittery gold spray-paint and went on my way.
At home I first sanded down each 14 x 14 square. With a damp sponge, I then ran it over each piece of wood, ensuring no wood dust remained. Using my sponge-tipped brush, I carefully stained each piece of wood. This took two days as I let one side dry over night before coating the other side and edges.

When it comes time for a fancy dinner, I never know where to put the forks and what side the knife goes on. So I thought it would be fun to create a ‘cutlery map’ stencil and fill it in using my glittery spray-paint. This way your chargers are not only good looking, but also practical!

For a final touch, gussy up the wine glasses and tie a colour-scheme appropriate bow around them. Ta da!
Stay tuned tomorrow for Mr Fab’s Christmas Challenge and find out how the Home Depot and The Fab Fam are helping youth homelessness this holiday season.
M Fab Craftycrafterson
Later this week, see how I made three other DIY Christmas crafts using Home Depot supplies. I just couldn’t stop crafting!!


absolutely love this DIY!
Thank you so much! It was so fun to do.