“My closet is SO organized!” – said no one, ever.
Last year I took possession of my newly built condo. Clean white walls, sleek modern kitchen, and an inner city patio to die for. But what it didn’t come with was storage!

No pantry.
No linen closet.
No broom closet.
And certainly NO room for my shoes and bags.
And when it comes to a blogger like me, who’s constantly shopping and accepting packages like I’m a postal worker, having organization and utilizing space effectively is a must.
So how was I to turn this ‘haute’ mess into something that didn’t resemble a swap meet?
It was time to visit the Home Depot for a LOT of help!

Here’s the thing:
I am not a handyman nor a builder, and I certainly do not have a lot of time or a lengthy attention span to get things done… And that’s why the ClosetMaid Selectives storage solution products became my new BFF!
I was about to turn the very well priced separate pieces into a closet design masterpiece!
After utilizing their online vitual tools, I met up with Beverly at The Home Depot for help. She guided me through all the pieces I would need and placed an order, all which was to be delivered to my home (no heavy lifting for this guy).

Then it was time to unload my closet and take a look at the ‘frame’ I was about to work with.
Small and boring, but I had the vision and I was keen to start.
First I removed the single hanging rack system and repaired the walls.

Then realizing I would need the individual pieces to sit flush to the wall, it was time to remove the interior closet baseboards and repair the walls.

Then it was on to the easy part:
Building the base pieces.
Now here’s the part when I tell you how it really is… The honest truth about how hard it was to construct all of the pieces.
It was the EASIEST!
Every individual unit is built using the same techniques. Once you understand how to put the first unit together, the rest of them can be built with out even opening the instruction guide.

My living room had become a closet factory and I was the Forman, Line Worker and Construction Guy.
Then, when all the individual parts were assembled, it was time to put them in place and attach them to each other and the walls so they would stay square and in place when loaded.

Because my closets were smaller than the recommended size usage, some of the parts like the rods and the finishing shelves had to be cut down.
When all those pieces had been properly sized and fitted and all the units were drilled in to place, it was time to re-load all of my belongings… And that’s when the fear set in!

I had just added a million more pieces in to and empty closet, wasn’t that going to give me LESS space?
The Answer:
NO!

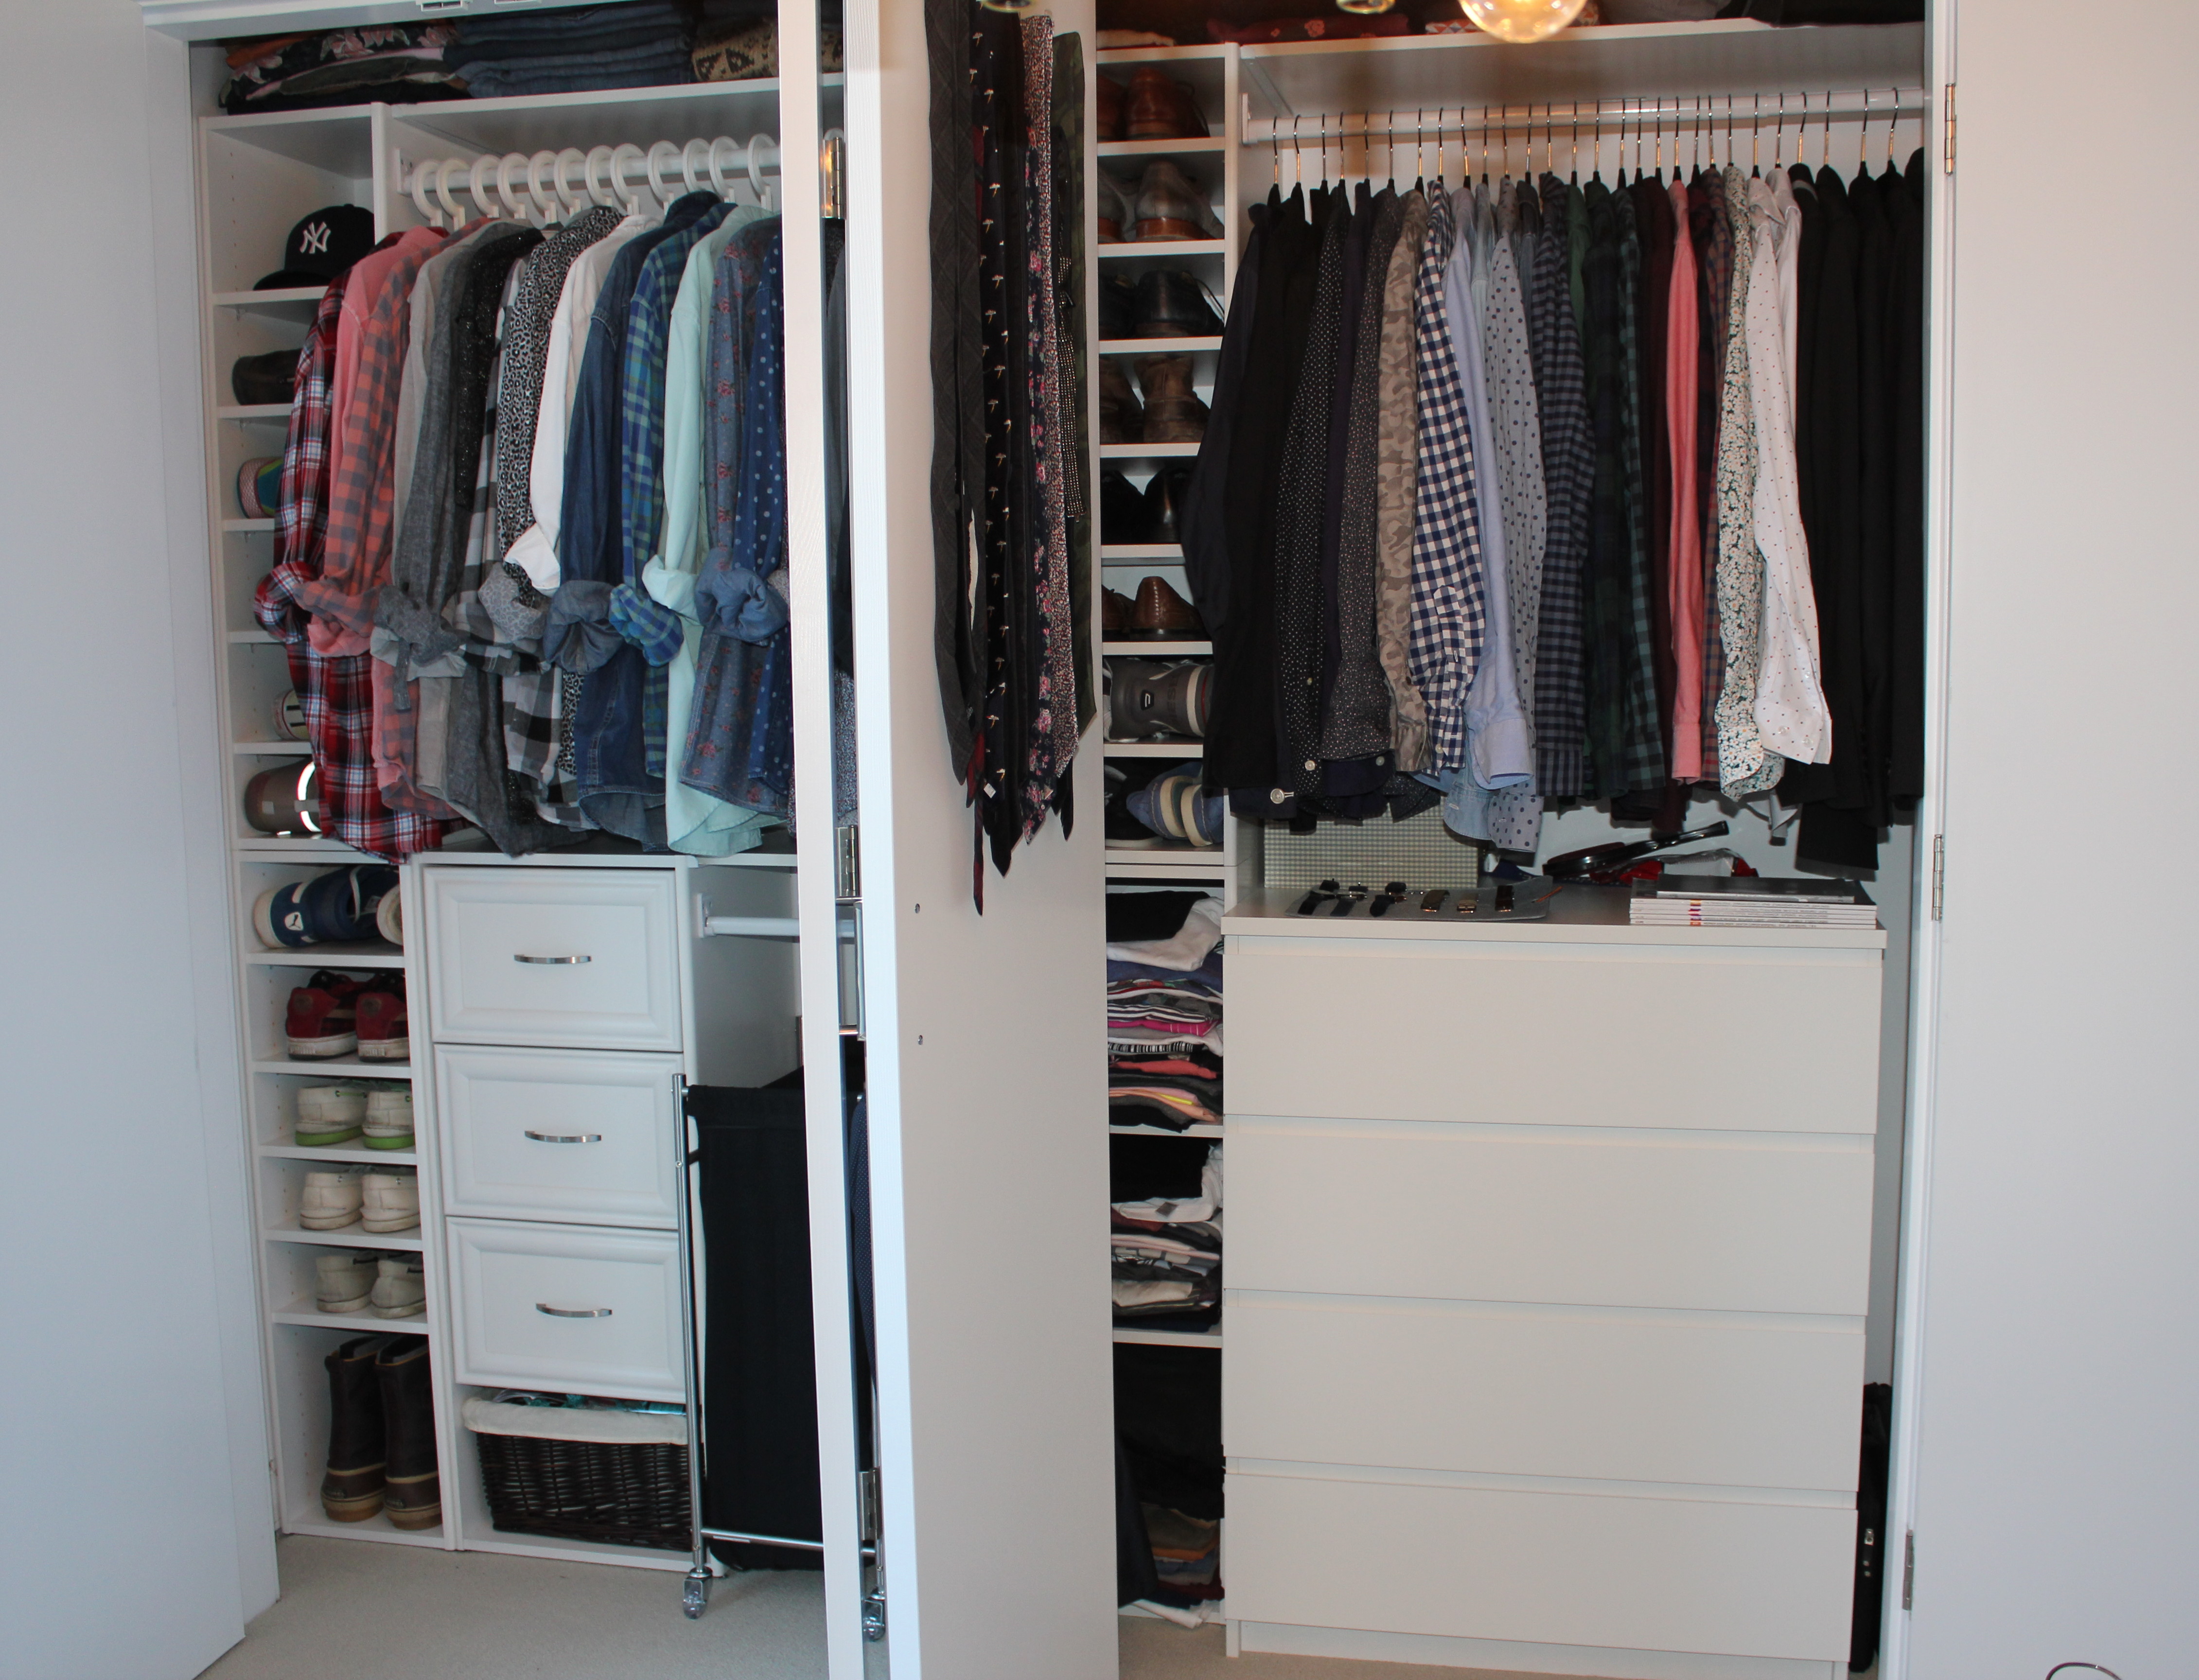
With a designated space for everything, ClosetMaid also utilizes the height of the ceilings and builds up so I was able to not only fit all of what was previously in there before, but I was able to move additional content in!
cough Shopping trip anyone? cough

On one side of the closet, its all about casual clothing, shoes and drawers filled with gym clothes and pajamas.
While on the otherside, a selection of dress shoes, ties and accessories.

And the crowning storage solution moment… I was even able to fit an entire dresser underneath the hanging bars to help house that future shopping spree!

Now lets talk price and time…
Each of the larger components were less than $140 each, while the accessories like finishing shelves, bars, and hooks average under $20 each.
And as for time, if you were to be dedicated, focused and call in a friend…. You could finish this in an afternoon.
But what happens if your closets more than just an area to store clothes and accompaniments?
Tomorrow, I will share my very secret shame and show you how I turned a (really) bad storage situation into something truly spectacular.
Mr. Fab makeover


your closets look awesome!
They look great! I’m coming over to borrow that denim polka dot shirt…
It looks really nice! I really need something like this! Thanks for the post! Greets!
Thanks a bunch.. It was really easy and looks like a million bucks!